I prefer using desktops over laptops as my primary development machine because I like keeping things running. When I come back, I can continue where I left off. I have a Mac Mini at home and a Mac Mini at work.
In the past, I have tried several syncing solutions to keep my different locations in sync. However, each solution had it’s own drawbacks, and wasn’t reliable enough for me.
I need a way to work from my MacBook. I also need to be able to access projects on my work computer, in case I’m working from home.
One option is to use Git as the source of truth, and pull down the code whenever I need to edit it remotely. However, if I’m working on changes that are not ready to be committed, they won’t be in Git. Also, I don’t have the secrets in Git. I would need to make sure I keep an up-to-date copy of the secrets on all my machines.
Remote - SSH on VS Code
I recently began using the VS Code Remote - SSH extension. This enables me to edit projects which are hosted on remote servers via SSH. The extension is able to forward ports from the remote machine onto my local machine.
My thinking was, it would be great if I can do this with my own computers. However, I was not ready to open up ports on my firewalls to allow SSH access.
Why not a VPN
The first thing that comes to mind is that I can use a VPN for this. I can add all my devices to the VPN and they can access each other. However, this would require a primary device to host the VPN. I was thinking of hosting it on my home server, which I already have always running to run other services. However, I didn’t want the complexity of a VPN. Remember, I only want the SSH traffic between the machines to go over the VPN. I didn’t know enough how I would set it up (though I do know it’s possible). I wanted something simpler.
Meet ZeroTier
This is when I came across ZeroTier. ZeroTier allows you to create a virtual network between your devices. There are client applications for Mac, Windows, iOS, Android, as well as for Linux, FreeBSD. It is also available as a Docker container which can be used for lots of other applications.
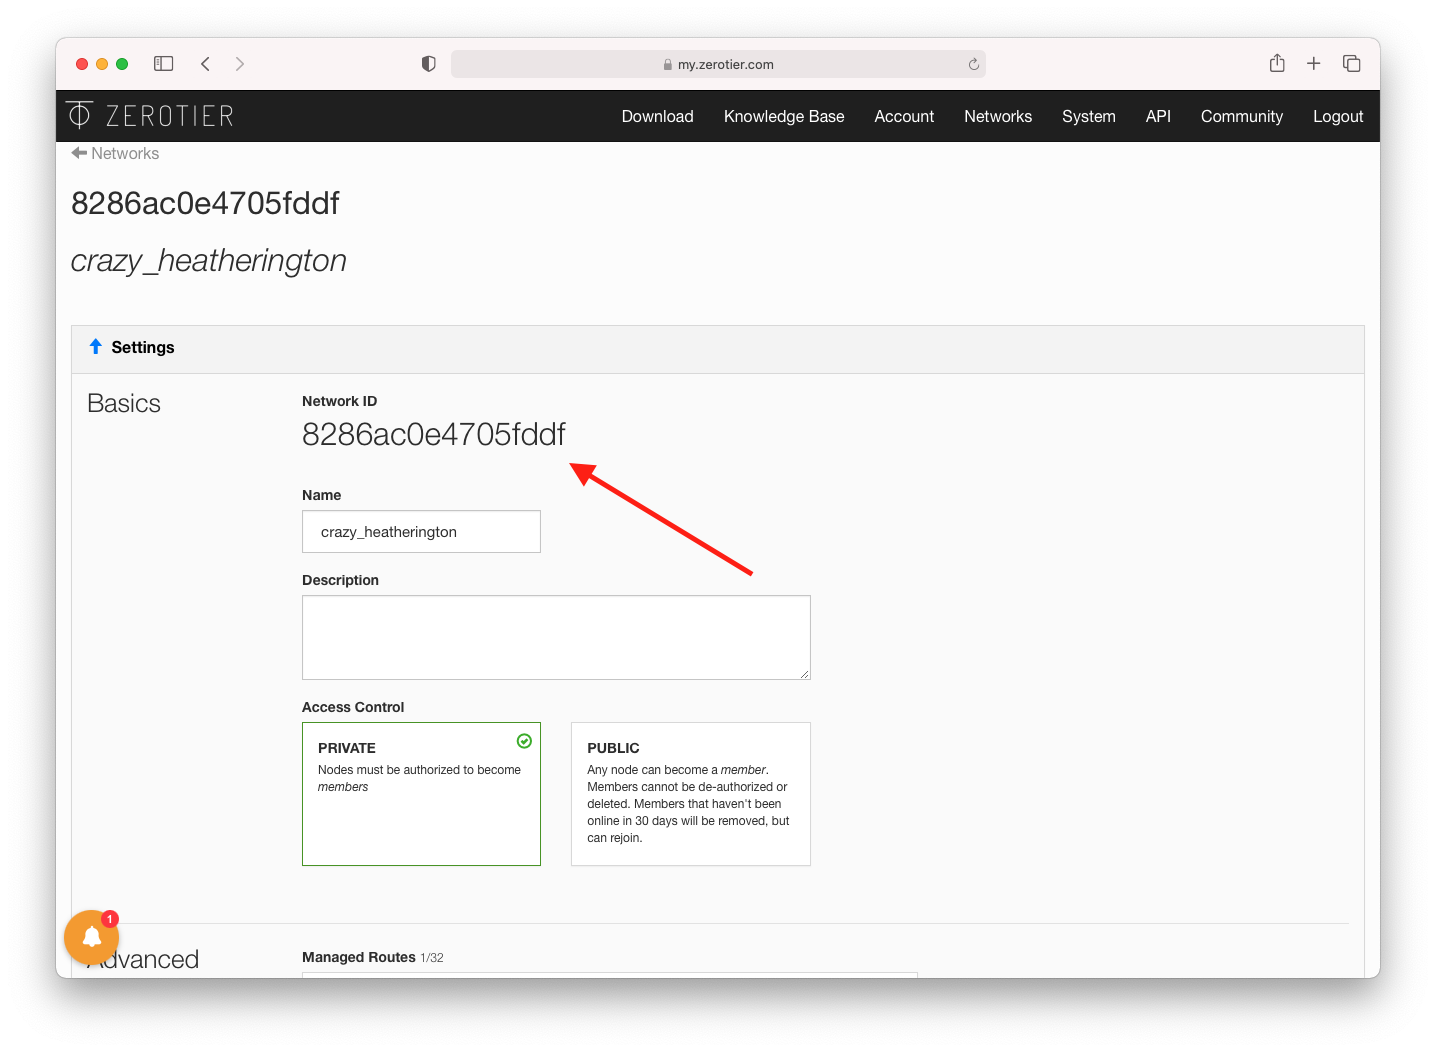
The setup is simple. You first create an account at https://www.zerotier.com and then press “Create A Network”. The network is given a random name. You can set it to whatever you want or leave it as is.
You’ll want to leave all the default Settings options the way the are. You shouldn’t need to change them.
The next step is to install the ZeroTier client applications on all the devices you would like to add to the network. I installed it on my two Mac Minis as well as on my MacBook.
The process is a bit different on other platforms, but on macOS, once ZeroTier is installed, there will be a ZeroTier icon ⏁ in the menu bar. If you don’t see the icon after installation, you may need to start the application first.
Select the Join Network… option.
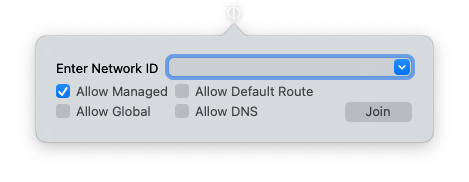
You will need the Network ID which you can find in the ZeroTier dashboard for this network. It’s at the top of the network page
Once you enter the id into the client, go back to the ZeroTier dashboard. Scroll down to the Members section. You should now see that a new device has joined the network. Devices that join the network, by default, do not have access to the network. You must give it permission by checking the Auth checkbox.
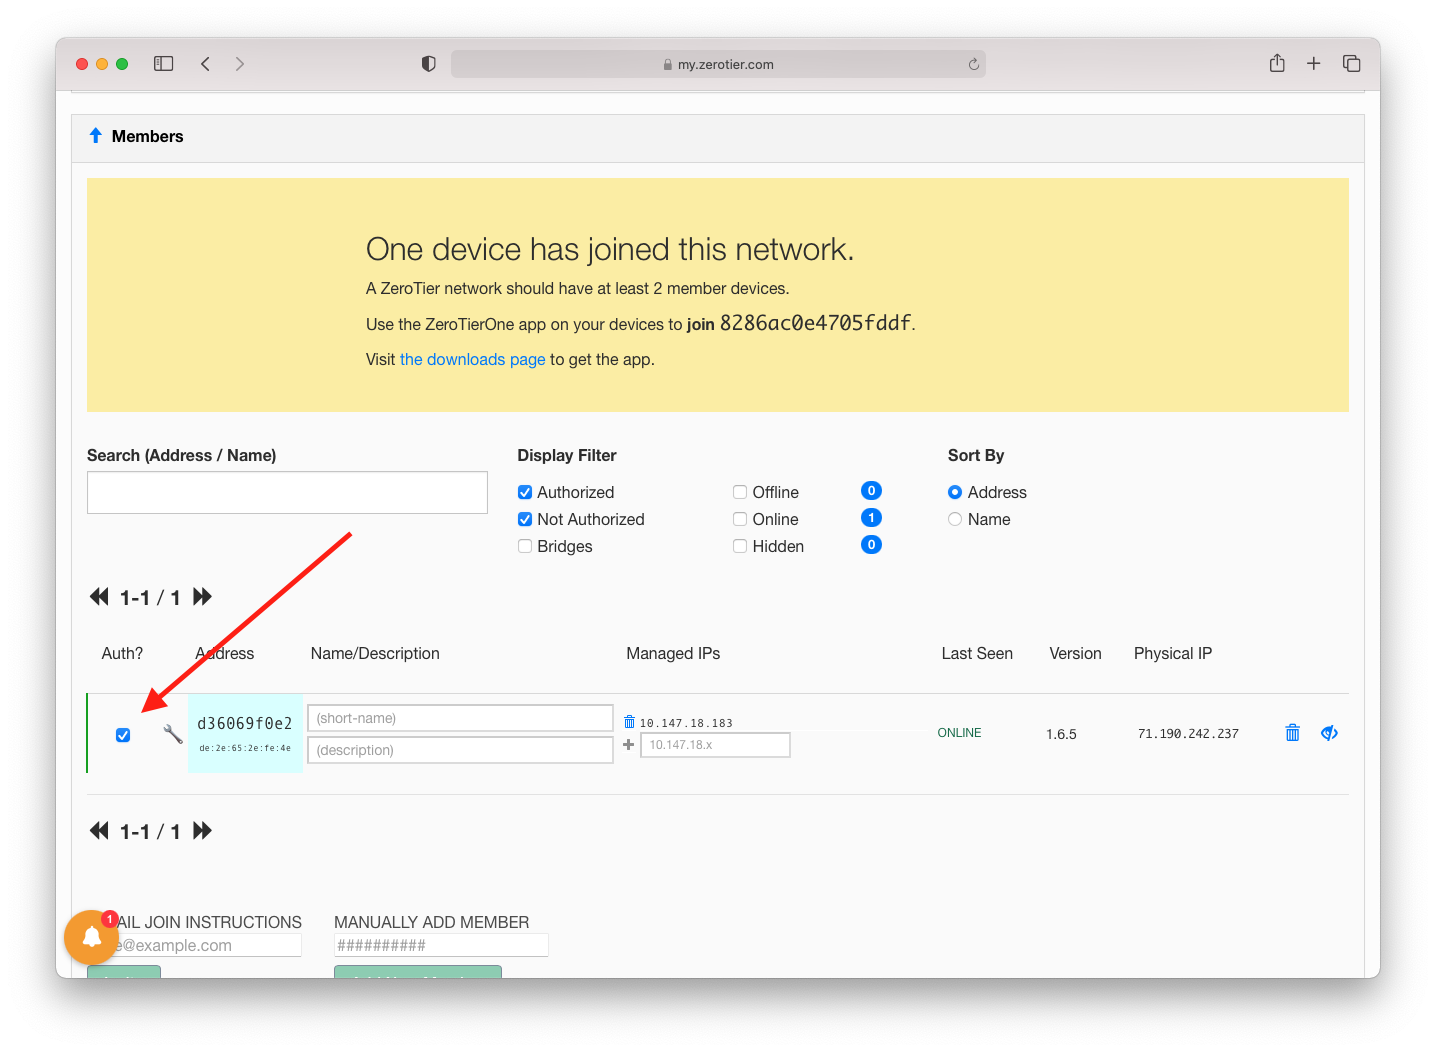
You’ll want to do this for all the devices you would like to access remotely.
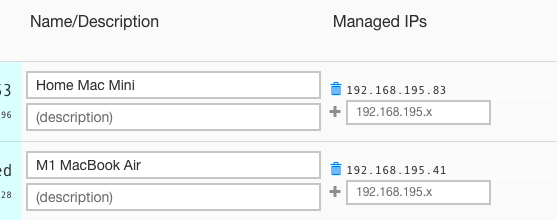
Once at least two devices were added to the ZeroTier network, they can access one another using the ip in the Managed IPs column.
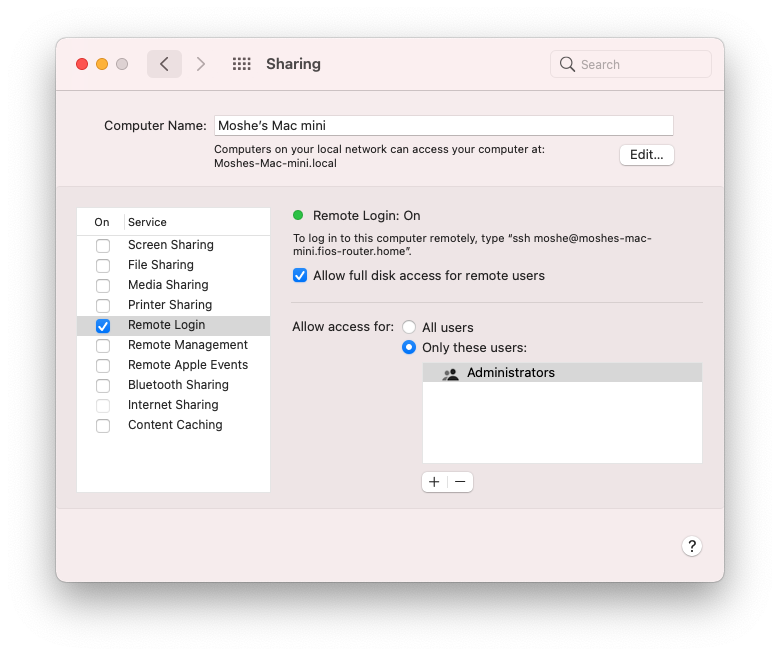
Allowing SSH Access on macOS
By default, macOS blocks SSH access. We can enable this by going to System Preferences > Sharing and enable Remote Login. You also want to enable Allow full disk access for remote users.
You can now SSH into the other machine by entering ssh <remote username>@<ip from ZeroTier>. You will be prompted for a password. This is the password of the user on the remote machine.
SSH Keys
While the current setup is good enough, it can get annoying to keep entering in your remote password. We can fix this by adding the keys to our authorized_keys file.
The following command will go to your .ssh directory and list it out. If you do not yet have a private/public key pair, please set them up first.
$ cd ~/.ssh && ls
You will need a private/public key pair on each of your machines. You can share the same pair by both machines or create new pairs for each one. (I’m not going to debate this now 😀 )
You then need to take the public key of each machine and add it to the authorized_keys on the other machines.
You can run
$ echo "<paste in a public key>" >> ~/.ssh/authorized_keys